| QuickPar | |
|
|
|
| Using PAR2 files to verify and repair data files | Top |
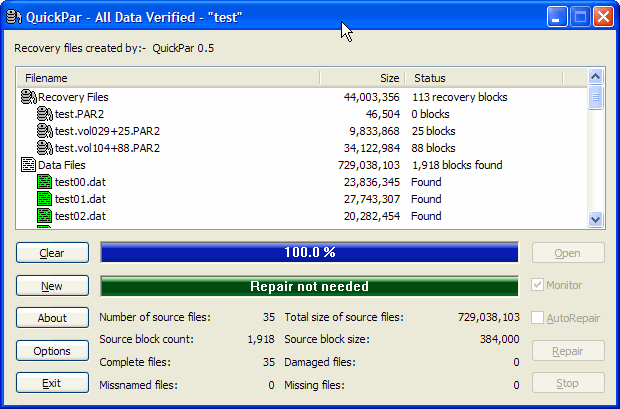
To use QuickPar to verify or repair data files, you should either double click (or right click and choose "Open with QuickPar") a PAR2 file in Windows Explorer, or start QuickPar and click "Open". QuickPar will immediatly start analysing the PAR2 files and verifying the files that they protect. You will see the following window:
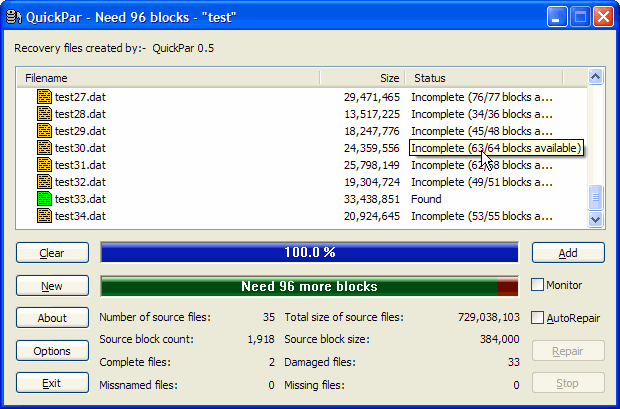
You will see in the above screenshot that all of the data files are complete and that the PAR2 files contain the correct number of recovery blocks. At this point you can Click "Clear" and then "Open" to open another PAR2 file, "New" to create new PAR2 files, or "Exit" to exit from QuickPar. Repairing damaged filesIf the data files are damaged, then QuickPar will display the following:
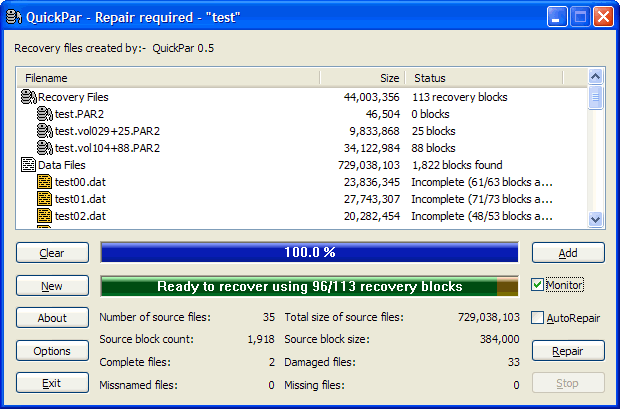
The information displayed shows that 33 of the 35 files are damaged and that the repair will require 96 blocks of recovery data. At this point you can have QuickPar load additional PAR2 files (to provide more recovery blocks) or scan additional data files (to see if they contain some of the data from the original files). To do this click the "Add" button and select the additional files. You can also select the "Monitor" checkbox and QuickPar will automatically scan new files as soon as they appear (e.g. if you need to obtain more files from UseNet). The screenshot below shows the results after some PAR2 files have been obtained and loaded:
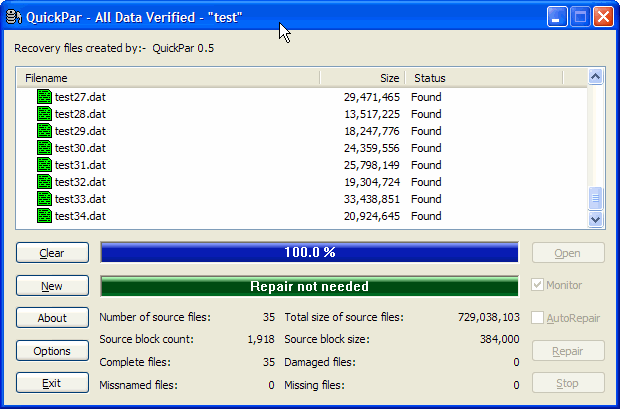
You will see that two PAR2 files have been obtained with a combined total of 113 recovery blocks and the QuickPar now indicates that repair is possible (using 96 of the available recovery blocks). You should click the "Repair" button to start the repair. When you start the repair, all of the damaged files will be renamed (with a ".1" file extension). Once the repair has been completed, QuickPar will automaticaly verify the repaired files:
|
|
Copyright © 2015 Peter B. Clements. All Rights Reserved.